What do you get for a 5 year old girl that isn't a Disney Princess? Oh- and she's being home-schooled?? Well, I decided on fun and educational-- Oh yeah, and HOMEMADE!
Our friends have two daughters with close birthdays (now ages 2 and 5). We got the obligatory store-bought noisy instrument toys for the 2yr old party. But for her older daughter, I decided to put spelling and math together and made Scrabble tile bean bags.
 First, I used some pillow cases for fabric. Here, the fabric stores are all the way downtown, and finding parking adds another 30+minutes to the 45 minutes drive, so I just get pillowcase variety packs (6 in a pack for $3) and use that for my fabric. I used white for one side and multicolored for the other side. All prewashed (though you won't be washing the bean bags, so it probably doesn't matter!). I starched the crap out of the colored fabric, but NOT the white!! Trace squares and cut them out. The starch helps make the cutting out part easier and the sewing part too.
***I'd recommend printing out the letters first to make sure you cut out squares that are big enough to iron your letters on and still have a decent seam allowance. I cut it pretty close on these.
 Print out your Scrabble letter on the iron-on transfer paper. MAKE SURE you print the out mirror image-- it's in the printer settings, not in Word itself. There, I just saved you about 45minutes! The small letters are for the coordinating t-shirt I made to go with this.
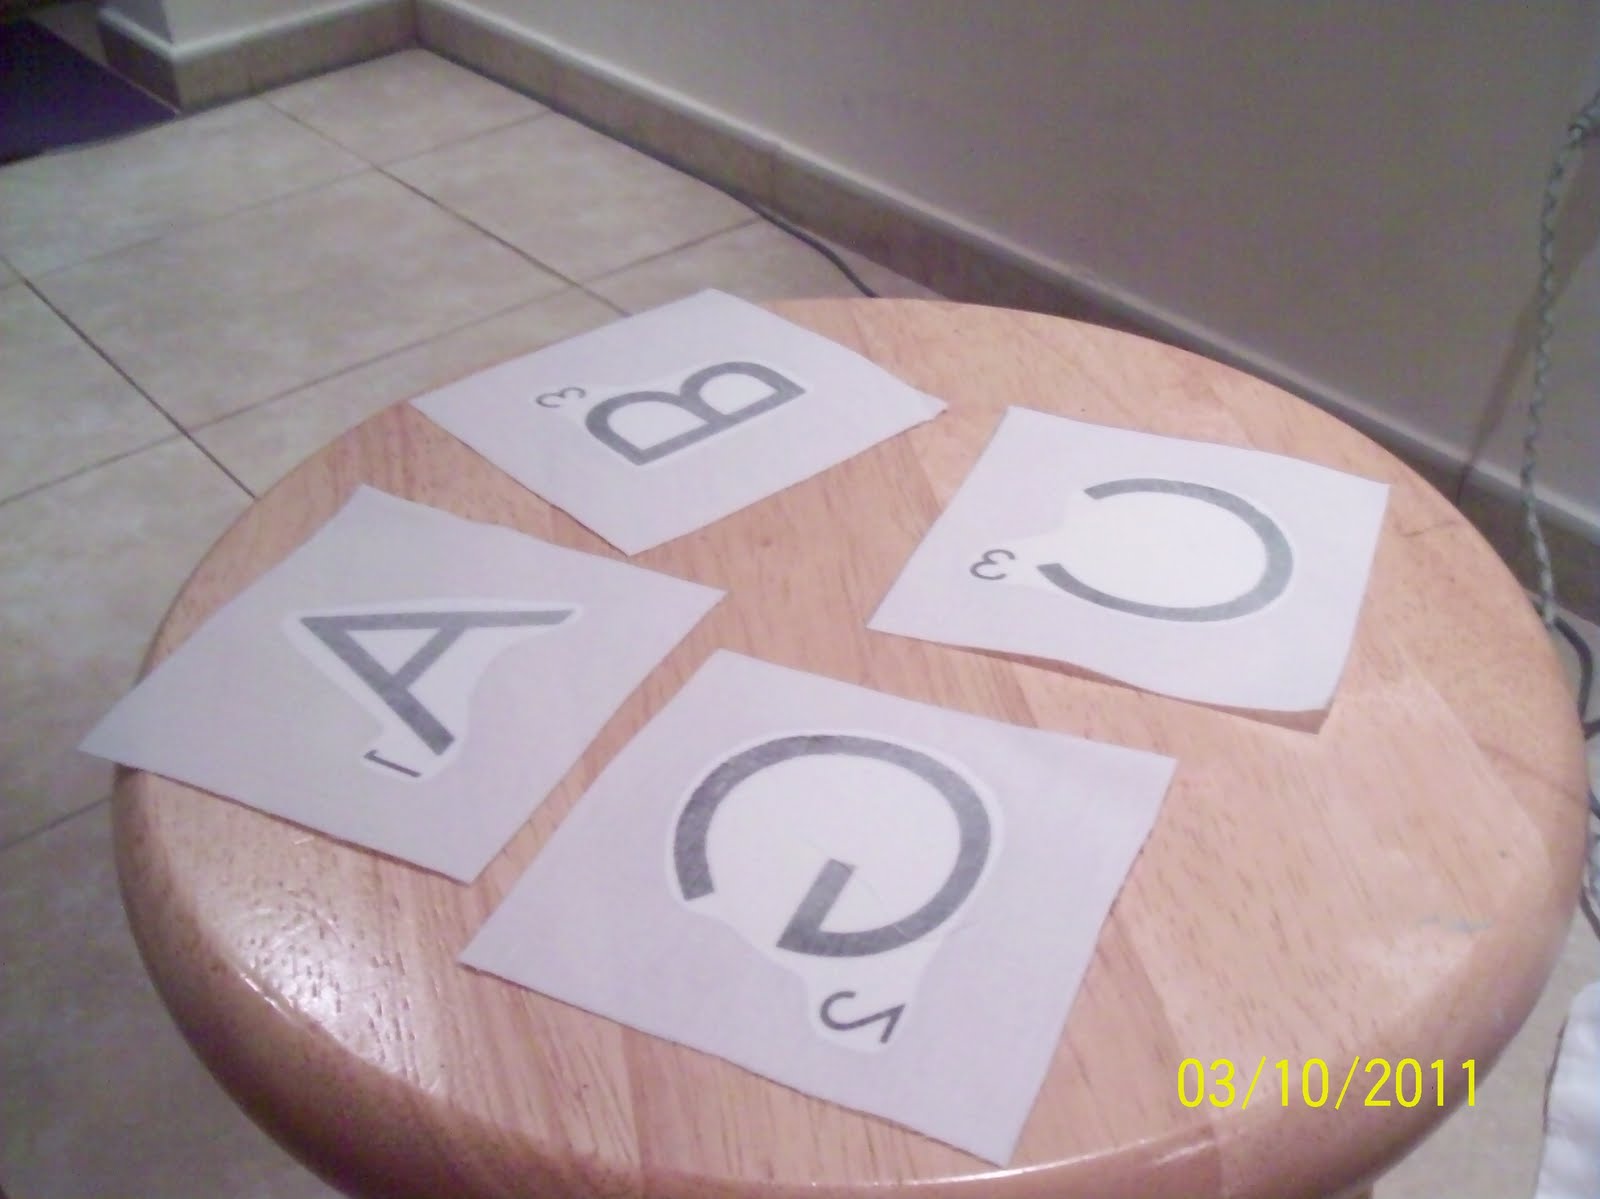
 In addition to printing a reverse image (remember we are ironing these onto the white squares), just use regular printing settings. The image on the RIGHT is with "Best Printing" selected--- way too much ink. Also, you don't need to Bold the letters. It bleeds too much to see the numbers clearly.
 Pre-wash a t-shirt for the smaller Scrabble tiles. I just used her name (and made on for her little sister too, since no 2yr old knows how to share!).
 Follow instructions on how to transfer the iron-on image. The instructions come with the paper, and night vary with brand, so read yours carefully!
 See, aren't they SO pretty!? And if you remove the backing paper and realize that you didn't iron it enough-- just use Parchment paper and iron it some more. YOU CANNOT IRON over the transfer without a backing-- it will melt. There, saved you another 30 minutes and a bucket of tears!
 Since I starched the squares, I only needed to pin the corners. I sewed around them, leaving a small opening to turn the pocket at the BOTTOM of the letter. I figured it would be the least conspicuous when I hand-stitched them closed.
 Turn inside-out and press on the white side with PARCHMENT PAPER!! Again, you REALLY don't want to melt the letters at this point.
 Rig up a funnel and use beans or rice (like I did) to fill the bags about 3/4 full.
 Don't they look so pretty all full of rice! Just need to hand sew them closed and then I'm set!
 I used the fusible hemming tape to keep these small letter in place on the t-shirt (ironed on with parchment paper press cloth) and then sewed around each letter.
 Spray paint a cookie tin white and place all the rice bag Scrabble tiles in side (I spelled "AUDREY" out on the top) and then put the shirts in too. I made a little topper (since it looked plain) out of colored cloth tape and used this rosette tutorial.
 The whole family was thrilled with the gift-- which is what you want to hear after making 26 little rice bags and two personalized t-shirts!! When I walked up to the door with the present, I heard the birthday girl say "Someone is bringing me a cake!". With the rosette topper, I guess it did look like a cake!!
There it is-- total cost = $10. Total time = about 8 hours total, but that was with me teaching myself how to make the roses and hand-stitching the baggies closed. And I'm estimating time-- it was more like "Last of the Mohicans" and "Oceans 11", plus 3 episodes of "In Plain Sight: Season 1". So... whatever that ends up being. (wink!)
Our friends have two daughters with close birthdays (now ages 2 and 5). We got the obligatory store-bought noisy instrument toys for the 2yr old party. But for her older daughter, I decided to put spelling and math together and made Scrabble tile bean bags.

***I'd recommend printing out the letters first to make sure you cut out squares that are big enough to iron your letters on and still have a decent seam allowance. I cut it pretty close on these.


There it is-- total cost = $10. Total time = about 8 hours total, but that was with me teaching myself how to make the roses and hand-stitching the baggies closed. And I'm estimating time-- it was more like "Last of the Mohicans" and "Oceans 11", plus 3 episodes of "In Plain Sight: Season 1". So... whatever that ends up being. (wink!)
Scrabble Birthday! Looks like a cool idea. My cousin’s birthday is also coming and I will be throwing a lovely and cute mustache themed birthday party for my son. I am going to book the most beautiful garden event venue for that. I just can’t wait for the day.
ReplyDeleteشركات مكافحة النمل الابيض
ReplyDeleteشركة رش النمل الابيض بالدمام